Electric Bike Camping Part 1: Planning, Gear & Other Tips
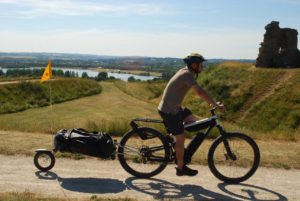
Traditional (ie not electrically assisted) cycle camping has something of a tough, outdoors image – you’ll be familiar with images of long distance cycle tourers loaded with large amounts of gear, fit and bronzed from many hours in the saddle, crossing deserts or slowly grinding up mountain passes.
The modern day fashion for bikepacking certainly looks more lightweight – it’s about strapping the very minimum of camping gear directly onto your bike – but it looks likely you’ll still have to be pretty hardy to enjoy the extremely minimal comforts of this style of cycle camping.
But there is third way and that is e-bike camping of course!
An e-bike lets you carry more gear for more comfort and convenience and put in less of the extreme physical effort associated with traditional fully-loaded cycle camping.
And best of all you still get to experience the pleasures of outdoor life on two wheels and the feeling of freedom and relaxation that come with the best cycle camping trips.
Which E-bike?
Riding with more weight, for example whilst cycle camping, obviously means less battery range, so as large a battery capacity as possible is advisable plus an efficient, powerful motor system.
Very handily I had Riese and Müller’ Delite Mountain Rohloff on test which looked ideal for off-road cycle touring with its powerful Bosch Performance Line CX motor and 1000Wh dual battery capacity.
Most importantly this bike was compatible with my chosen trailer (more on that below); the rear Rohloff gear hub came with the traditional quick release axle (QR axle), not one of the thicker, modern thru-axle designs becoming very popular on high quality e-bikes.
It can be difficult getting traditional trailer designs to fit with modern thru-axles so you might have to do a bit of research if you are planning on taking a trailer to ensure it’s compatible with your e-bike.
The Robert Axle Project specialises in adapting quick release designed trailers to fit modern thru-axle bikes.
Trailer or Panniers or Both?
The most obvious advantage of a trailer is that it lets you take more gear for your comfort and convenience.
And again, the traditional objections to trailers of extra weight and rolling resistance are much less important once you have a powerful motor and plenty of battery capacity on board.
Family e-bike campers will also love the ability to bring extra gear in a trailer, be it a favourite toy or just the extra food and clothing required.
Of course if you are happy to travel relatively light (and this goes doubly if you are making a short trip) pannier bags only are, of course, fine and have the advantages of simplicity and lightness.
Front pannier racks and Gorilla cages can come into their own here, to help take a bit of extra gear and balance the bike’s handling too.
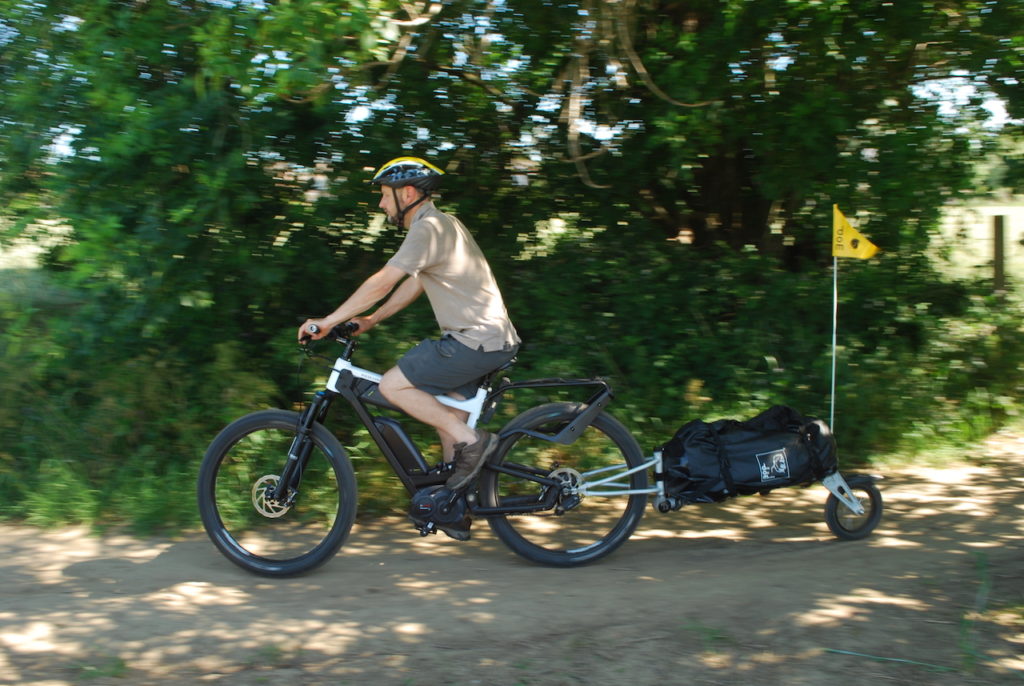
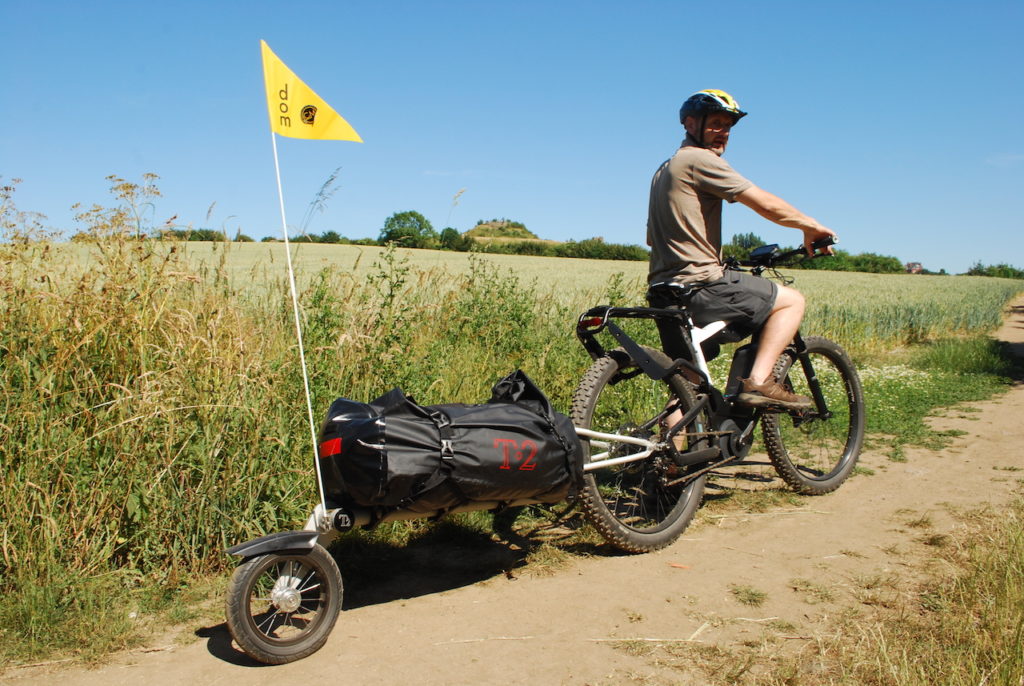
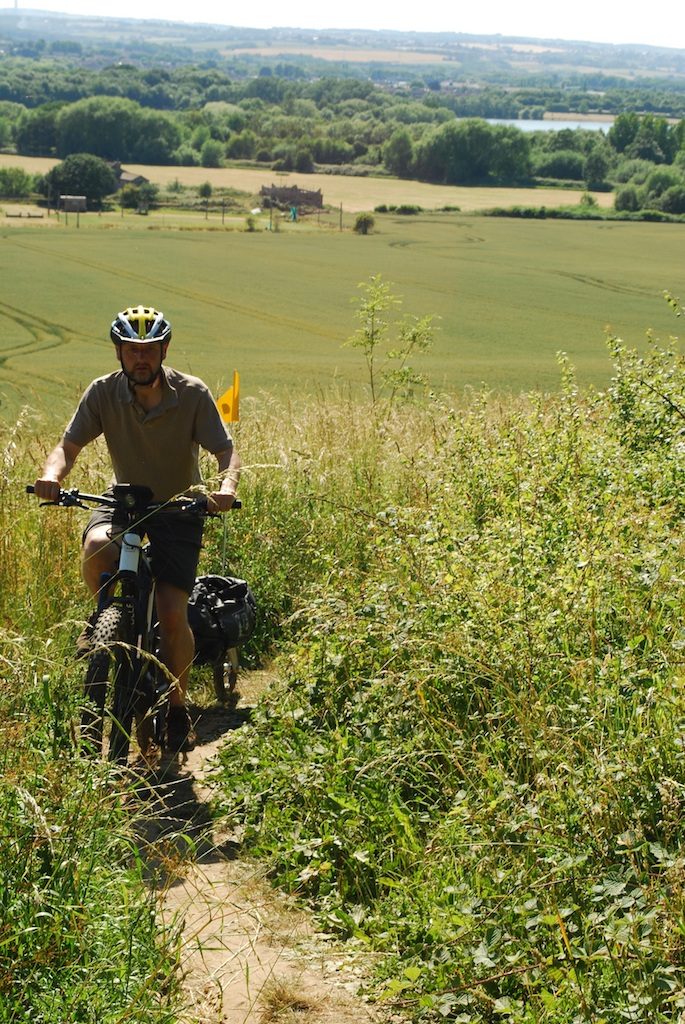
As I like off-road emtb style cycle touring and I like my comfort I chose to take a single-wheeled trailer in the form of the excellent T2.
Single-wheel trailers are often used for off-road tours as they don’t affect the bike’s handling so much, especially off-road being able to follow the ‘lean’ with the bike itself and also being able to follow the track of the bike itself more closely.
Perhaps most importantly they eliminate the risk of the trailer tipping over completely which I have had happen when going over a big curb with a two-wheeled trailer and they can negotiate single track which two-wheeled trails usually can’t.
An added advantage is that they are usually lighter than two wheel trailers. The T2 is particularly light (lighter than its well-known competitor of similar design, the Bob Yak) and comes with an impressive 70 litre waterproof detachable bag and 30kg load rating. Note rear touring panniers average around 40-50 litres a pair.
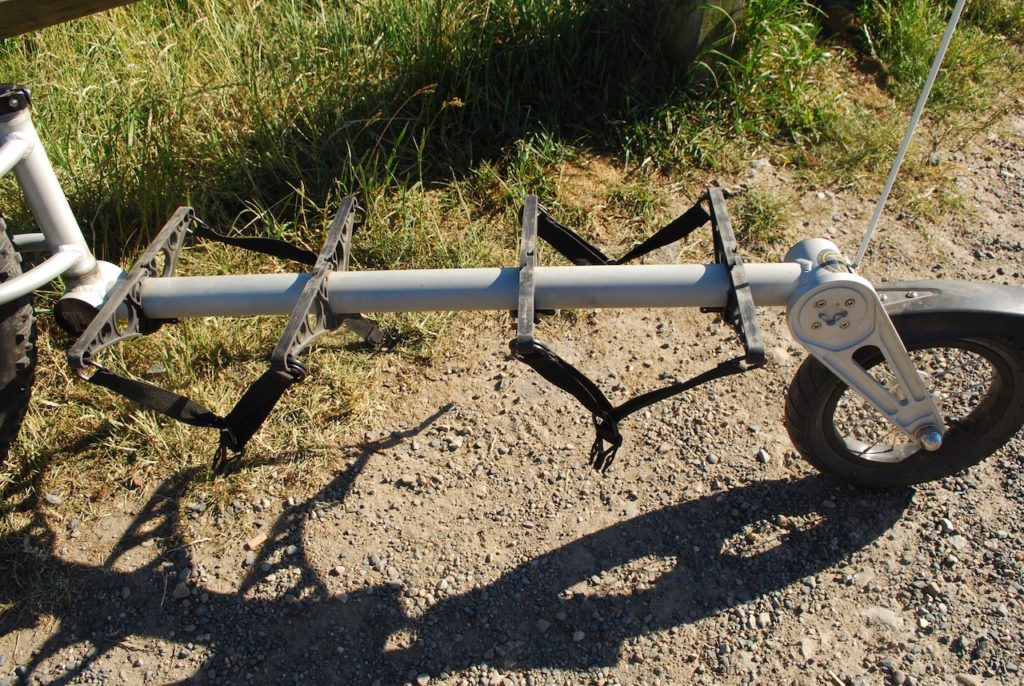
The T2 itself looked a neat design – it is lightweight and its 12” rear tyre gave a reasonable compromise between ground clearance and shortening the length of the trailer (it sits at the back end of the trailer).
In particular the mounting yoke looked like it would promote stable handling as it fits onto both ends of the quick release axle, so the pulling (and pushing) forces between the bike and trailer should be fairly evenly distributed.
It’s simply a matter of changing the rear Q/R skewer for the one that fits the Rohloff (QR skewer also available for derailleur gears and special nut fittings for Shimano Alfine hubs).
However you should check with the retailer that your particular wheel size should fit; the R&M Delite Mountain Rohloff is fitted with 27.5” x 2.8” tyres that just fit into the mounting yoke – any larger tyres would have likely not fit and rubbed on the edges.
The various components of the T2 are removable and replaceable should breakages occur after particularly rough trail riding and the bag quickly and easily removes and the yoke swings back over the trailer body for easier more compact storage.
As my trip was something of an experiment with the single-wheel trailer I decided to keep things simple and take only gear I knew to be what I consider essential for my cycling comfort.
I have subsequent trips planned with the same trailer and panniers if I want to go for super-luxury or for more ‘wilderness’ experiences where a bit more gear would be needed.
I did a quick shake-down trip of an afternoon’s ride with a fully loaded trailer around a few miles of local trail with moderate hills on hilly but good quality off-road surfaces.
What Gear to Take
Note the following list is based on summer conditions at UK campsites
This really depends on what you think you will need to make you comfortable, especially when it comes to personal luxuries. Some might be unable to get a good night’s sleep unless they have a really comfy bed and pillow (like me) whereas for others a larger tent they are able to stand up in is vital to stop a complaining back.
In any event a test night camping or a shakedown ride at the very minimum is a very good idea to stop problems during longer e-bike camping trips further afield.
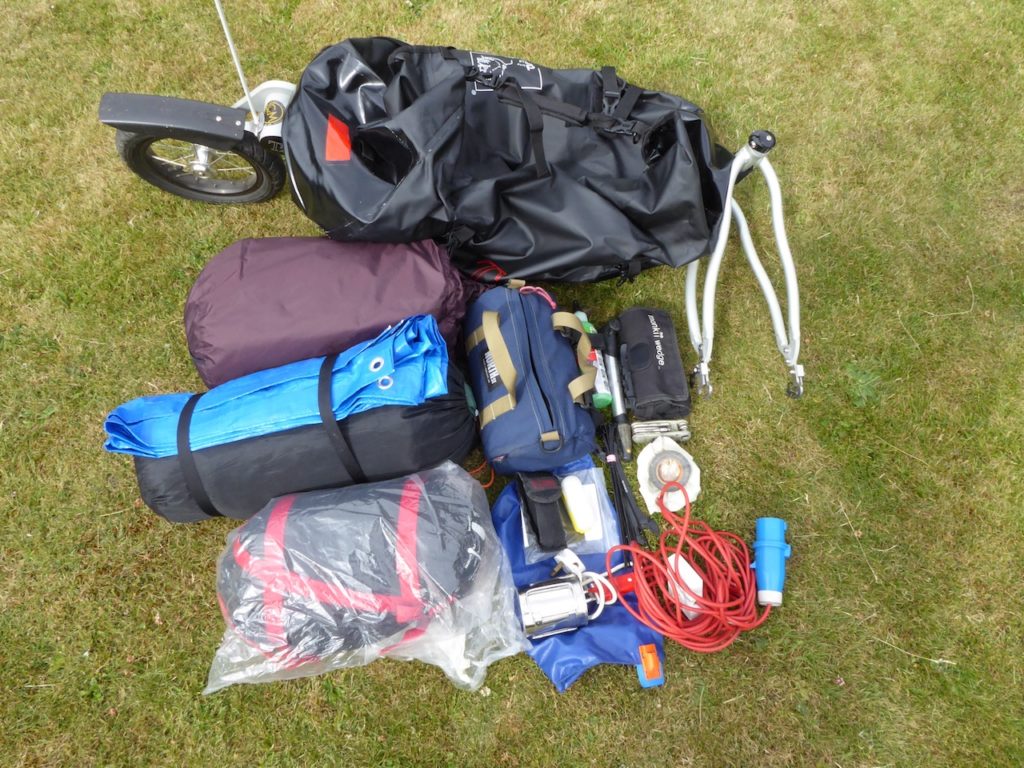
Here’s my list of gear, item weights and my reasoning for taking them based on a recent trip as a guide (ride report on the trip is a separate article). It was my first cycle camping trip for a long while and my conclusions about what gear I would need to add or that I felt redundant comes in a ride report article.
Tent and groundsheet – Vango Spirit 200+:
3.3kg. This is an older model I’ve had few years and used only occasionally. It’s now out of production, however the Vango Pulsar Pro 200 looks more or less identical.
It’s quick and easy to set up – just thread the alloy poles into the sleeves and peg out the outer. The inner quickly hooks onto loops in the inner and has handy mesh storage pockets.
Thermarest Neoair Dream
2.1 kg. Yes I know this is really very heavy compared to most camping mats but it combines air insulation with memory style foam for the a sleeping experience that feels just like a real bed to me.
Pillow 0.55kg. Another ultimate luxury of a soft foam pillow…
Tools:
Tool Roll 1.95kg. Yet again this seems like a lot of weight but does contain a bottle of slime that I forgot to remove before setting off as I had spare inner tubes anyway. I don’t skimp on tools as they may prove vital in getting you home!
Sleeping bag:
0.95kg. Even though it was a hot summer this was still needed in the cool of the night. Not ultra-light by modern standards but it is a budget two-season model. I could upgrade to a lighter three season model if I plan to head out in cooler weather and save weight at the same time.
Trailer: Circa 5kg
Electrics:
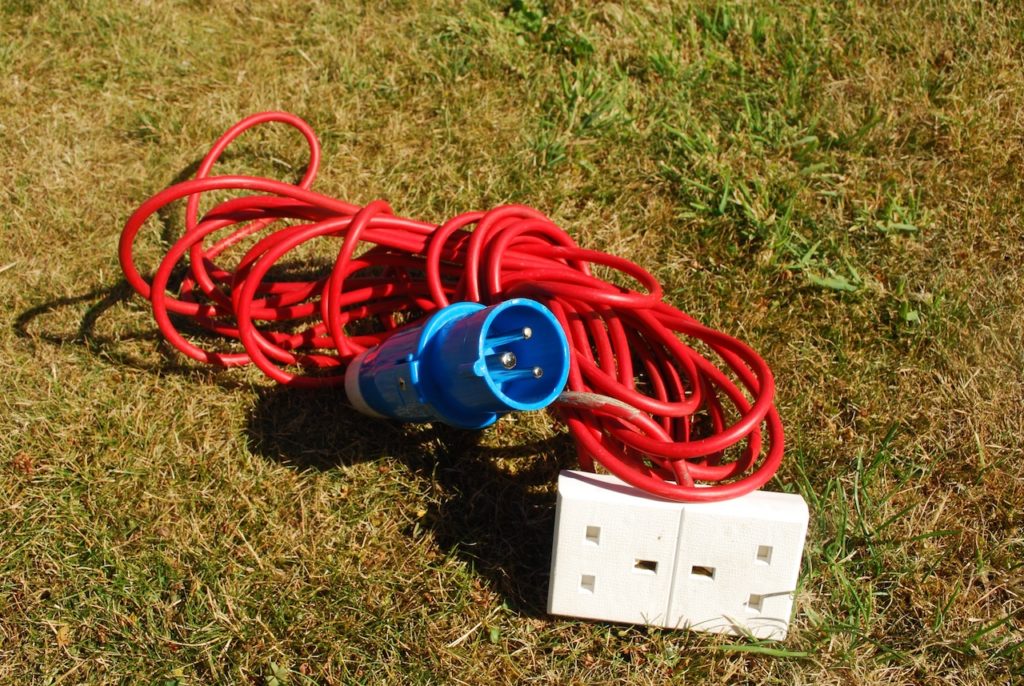
Charging lead 0.675kg
Camping light: 0.75kg
Bosch charger: 0.75kg
Difficult to see how much weight could be saved here other than swapping the Bosch charger for the compact travel charger, which would save around 200g but would take longer to charge the batteries.
Cooking:
Electric cup heater for soup, Steel cup with folding handles, cutlery Swiss Army style knife- total 750g
Again, the bare minimum if you want at least a hot drink or soup and bread once you are pitched.
Clothes, small towel and washing gear:
1kg. Again, difficult to see how you could save much weight and autumn camping would mean heavier, warmer clothing and a gain in weight.
RUNNING TOTAL:
Circa 12kg gear and 5kg trailer means puling around 17kg behind you.
Despite much published advice to the contrary I also tend to cycle with a small, lightweight backback. The main advantage of this is that I can keep my phone charged by solar power during summer months (the solar panel easily goes on the back of the bag and gets full exposure to the sun), using the Freeloader Off Grid Adverturer solar system as reviewed here.
This doesn’t add much weight – it’s barely noticeable on my back and doesn’t destabilise me riding at all (though it can be a bit sweaty in high summer). It also allows me to have any other lightweight bits and bobs to hand such as cameras or snacks.
On this trip I took along a helmet fitted with the GoExtreme Pioneer helmet cam fitted to a helmet for testing. When not needed it fitted neatly in the backpack but could be in use very quickly.
Now check out Part 2 for the eBike camping ride report.
-Richard
P.S. Don’t forget to join the Electric Bike Report community for updates from the electric bike world, plus ebike riding and maintenance tips!
Reader Interactions
Comments
Trackbacks
-
[…] I’ve already outlined the planning stage of my e-bike camping trip in terms of equipment in a previous post. […]
-
[…] easier to sit down and put a list together. For e-bike camping you can also refer to EBR articles here, here, here and […]


Great info to share, I really love it, thank for your sharing